30 January 2017

A Cozy Cape

This refashion came about thanks to my good friend Sarah, who sent me this tutorial of how to make a cape.  I didn't have two meters of super-thick wool knit lying around, but I knew this wool skirt could easily become something similar.

This is a very stern skirt
This looks like something a cranky librarian would wear, and while I do work in a library I would never wear this to work!  Fortunately, this skirt did have a very nice flare to it that I was pretty certain would work well for my cape.  It also had something else.

A hook-and-eye closure! 
This little clasp at the top of the zipper was going to be how I'd fasten my cape and keep it on.  But first I needed to turn this tube into a flat piece of fabric again.  I grabbed my seam-ripper and took out the zipper.

Don't worry, I'll save it in case I can use it later!
Then I opened up the rest of the seam that the zipper had been sewn into.

pick, pick, pick...
All that ripping left me with this.

A skirt no longer!
Then I dressed Gruella and pinned in some shoulder seams, just like I did for the Starry Night Skirt-to-Tunic.

Fins are pinned.
I stitched down those shoulders and clipped off the extra fabric.

Stitch!
Clip!
And that's it!  Now I have a cape that's a decent knock-off from the one in the video, without having to go out for new fabric!  Thanks for the idea, Sarah!

Flowy!
I'd have to bundle up with a little more if I wanted to go outside, but for a winter's day of blogging and reading, this will keep me nice and cozy! 

26 January 2017

Autumnal Shirt-to-Skirt (or Clothes are Tubes, Part 2)

Look at this shirt.

meh.
The body is huge (though admittedly a decent length), but the sleeves are too short!  How does this make sense?  Fortunately, I knew how to fix it.

Mwahahahaha!
Nope, I'm not going to fix the bad fit of this shirt. I don't like button-ups anyway.  I'm going to turn this into a skirt!

Gruella doing her part.
 I put the bottom of the shirt onto Gruella, and pinned it into shape.

More pinning
Then I stitched down all of those new darts.


I trimmed off the extra fabric.

The jagged-toothed scissors!


Then folded down the top raw edge and stitched it down.

No fraying!
 And now I have a new fun skirt that fits perfectly!

Colourful!
It's a little autumnal for January, but the weather has been feeling a bit transitional recently so I figure I can get away with it.

20 January 2017

Clothes are Tubes

This refashion is such a cheap hack it barely seems worth posting.  It began with this too-small skirt.

Terrible skirt deserves terrible face...
I usually prefer to buy clothes that are too big, rather than too small, but I bought this one without trying it on, thinking that maybe I'd make a pillow-cover out of it if it didn't fit.

Then, last night, I came to a profound realization: all pieces of clothing are really just tubes!  Some are tubes with extra tubes, like shirts and pants, but skirts are as simple as they come. Inspired, and slightly chilled after a morning trip to the pool, I simply draped this too-small skirt around my neck into a fabulous over-size infinity scarf!

Keeping that wet hair away from my neck!
Easy as pie!

19 January 2017

The Wannabe Regency Dress

I've had this dress in my refashion closet for a while, and I must admit that I quite like it as-is.

Too 90s?
It fits perfectly, I absolutely love the print on the fabric, and it's very comfy.  That empire waistline also puts me in mind of one of my favourite books/tv adaptations.

Puts the 2005 movie to shame!
But much as I liked this dress, I knew that I wasn't all that likely to wear it in its current form.  Long skirts and wet weather don't mix, in my experience, and the fabric was a little too stuffy to wait for a summer maxi dress.

The first step towards improving this dress was removing those fake-belt side-tie things by snipping them off as close to the seam as possible.

Snipping away the outdatedness!
Then I cut quite a bit off the bottom to make this dress a length I was much more likely to wear!

Fold as you cut to keep it even, Steven.
I folded over the bottom edge twice and pinned it to clean up the unfinished edge.

Fold twice, pin once!
Then I stitched it down.


And ironed the new hem.

Pressing hems makes them look more professional.
This all improved the length of the dress greatly, but without those side-ties there was no way to give it any shape.  I looked through my elastics and ties drawer, but I didn't have a length of narrow elastic that was long enough to go around my waist.  Fortunately, I did have one that was half long enough.

I turned the dress inside-out and pinned the elastic to the back, from side-seam to side-seam, with a few other pins to keep it even.

Do you see my plan?
Then I stitched the elastic down, stretching it out as I went.

Here's the end result!

Me like!
 And the back!

Elastic gathering!
See how the elastic gathered the fabric, giving the dress a waistline?

Sometimes it's hard to refashion something that you like to begin with, but that you know, deep down, you'll probably never wear in its existing form.  After months of biting my nails over this one, I finally dug into it, and I'm glad I did!  Have you ever had a refashion that hurt to start?


15 January 2017

Sweater Down-sizing

I wasn't planning on doing a post today, but when I put on the thrifted dress and cardigan that I wanted to wear to work I noticed this.

It's a little big...
I knew this cardigan was an extra-large, but I thought I could wear it anyway and just have it a bit baggy.  Problem was, it was way beyond "comfortably loose" and had ventured into "shapelessly over-sized."

It was a simple fix.  I just lay it inside-out on the floor and pinned both sides a good 3cm or so.  Then I ran it through my sewing machine, which handled the stretchy knit just fine.

Taking it in.
Then I snipped off the extra fabric from the sides.

Trimming.
Then I put it back on and headed out the door to work!

Much better!
Not bad for such an impromptu refashion!  It'll keep me nice and cozy in the icebox that I work in.

14 January 2017

Starry Night Skirt-to-Tunic

I snapped up this skirt for $1 because even though I knew it would be huge on me, the fabric felt comfortable and promising.

There's a lot of space in here...
It also put me in mind of Vincent van Gogh's Starry Night (read about it here).

Blue swirls!
 I put this skirt inside-out on Gruella, and pinned the waist-now-collar so that it stayed up and draped nicely.

New shoulder seams pinned!
And a close-up...

Just one pin to mark the angle.
I stitched down the new shoulder seams, after replacing my sewing machine needle (the old one gave me a lot of grief in that last refashion).

Two quick stitches!
 Then I trimmed off the excess fabric.

Bye-bye bulky shoulders.
Now, of course, this skirt-to-tunic refashion was missing something important--armholes!  I cut a hole in either side of the skirt, just below the new shoulder seams.  I'd tested the fabric when I trimmed off the excess and I knew it wasn't going to fray, so I didn't have to worry about finishing the edges.

Adding arm-spaces!
I fiddled with the size and shape of the armholes a bit until they fit nicely, then pulled on my new tunic, added a narrow belt and black leggings, and struck a pose!

Swirly!
Any skirt can become a top, with a little creativity!  Pull a maxi- or midi-skirt up under your arms, add a belt if you like, and you have a breezy sundress.  If the skirt is too small, use the waist as a neck and cut armholes (depending on the fabric you may need to finish the armholes somehow).  What are your ideas for refashioning skirts into shirts?


12 January 2017

Shoelace Scrap Hack

Today's refashion is a quick and easy one.  I bought this pair of shoes for $3 at the Hospice Resale Shop, because I am in love with any shoe that looks remotely like an Oxford.

Not bad, not bad at all.
In fact, I would have left these shoes exactly as they are, if it weren't for one teensy problem.

Is that a safety pin?
Apparently the lace had snapped, and the previous owner of this shoe had decided to safety pin it back together.  I knew there had to be a better solution, so I dug through my "shaped like something useful" scraps and found these.

Sashes!
These sashes came with dresses that I'd previously refashioned, but I've never been a huge fan of the dress-with-matching-sash combo.  I decided to repurpose one of these sashes as a pair of shoelaces!  I removed the undamaged shoelace from the shoe and lay it out alongside the sash, to see if I would have enough length once I cut it in two.

Will it be long enough?
I didn't want the new shoelaces to be as long as the originals, because I dislike big, floppy bows on my feet (it's a tripping hazard I don't need added to my life).  I cut the sash in two, praying that I wasn't misjudging the length.

Then I had a problem, because the end of the sash was too fat to fit through the holes for the laces.  Nothing daunted, I grabbed a needle and thread and bound the end of the new shoelace tightly to make it thinner.  Then, using the needle still attached to it, I threaded the lace through the shoe.

Make the end narrower so it fits!
I finished the ends of the shoelace by tying a knot, so the raw fabric where I'd snipped it wouldn't fray.

Almost done!
Then, of course, I had to repeat the entire procedure on the second shoe.  Here's the result!

Quirky!
Not only did that sash rescue these shoes from a safety-pin mending job, it also made them a heck of a lot more interesting!  Unfortunately, I'll probably have to wait a few months before I can wear these shoes anywhere, since they are neither cold- nor snow-worthy.  But at least I'll have some funky footwear come spring!


11 January 2017

NHSS Dress

Today I handed in the complete and final version of my thesis to my university, marking the end of my Master's degree.  I was feeling a bit nostalgic, which made me remember this shirt!

NHSS!
This, my friends, is a very boring navy blue T-shirt from my days with the Northern Historical Student Society (known to our friends as the History Club).  There is nothing wrong with this shirt, but I've never worn it because I find few pieces of clothing as dull as event T-shirts.

Fortunately, I also had this exceedingly dull but oh-so-comfy dress that I picked up yesterday for $1 at my favourite thrift store!

Boring!
These two pieces were about to become one!

"You complete me!" says boring blue dress to T-shirt
First, I cut out the only interesting part of the T-shirt, the NHSS icon on the side.

Snippy snip!
Then I trimmed it to a shape I liked, and tried out a few different placements on the blue dress.  I settled on this:

Looks kind of super hero-ish, doesn't it?
I pinned it down very securely.  Both of these pieces were a bit stretchy and I didn't want the appliquéed bit to go wonky.

LOTS of pins!
Then I thought of something else!  We're in the middle of winter, here in the British Columbian north, and that means temperatures regularly hit -20 Celsius (it was -25 when I got up this morning).  No way was I going sleeveless, even indoors!

Since the T-shirt was toast anyway, I decided to transplant its arms onto the blue dress, too.

Mwahahaha!
I pinned the sleeves onto the dress, then, after fighting with my sewing machine for a full half hour, taking it apart, cleaning the inside (ew!), and putting it back together, I stitched everything together with white thread because I wanted the stitching to show on the appliqué.

Stitching away!
I trimmed off the extra fabric from around the edge of the NHSS image.

Goodbye, awkward ruffle
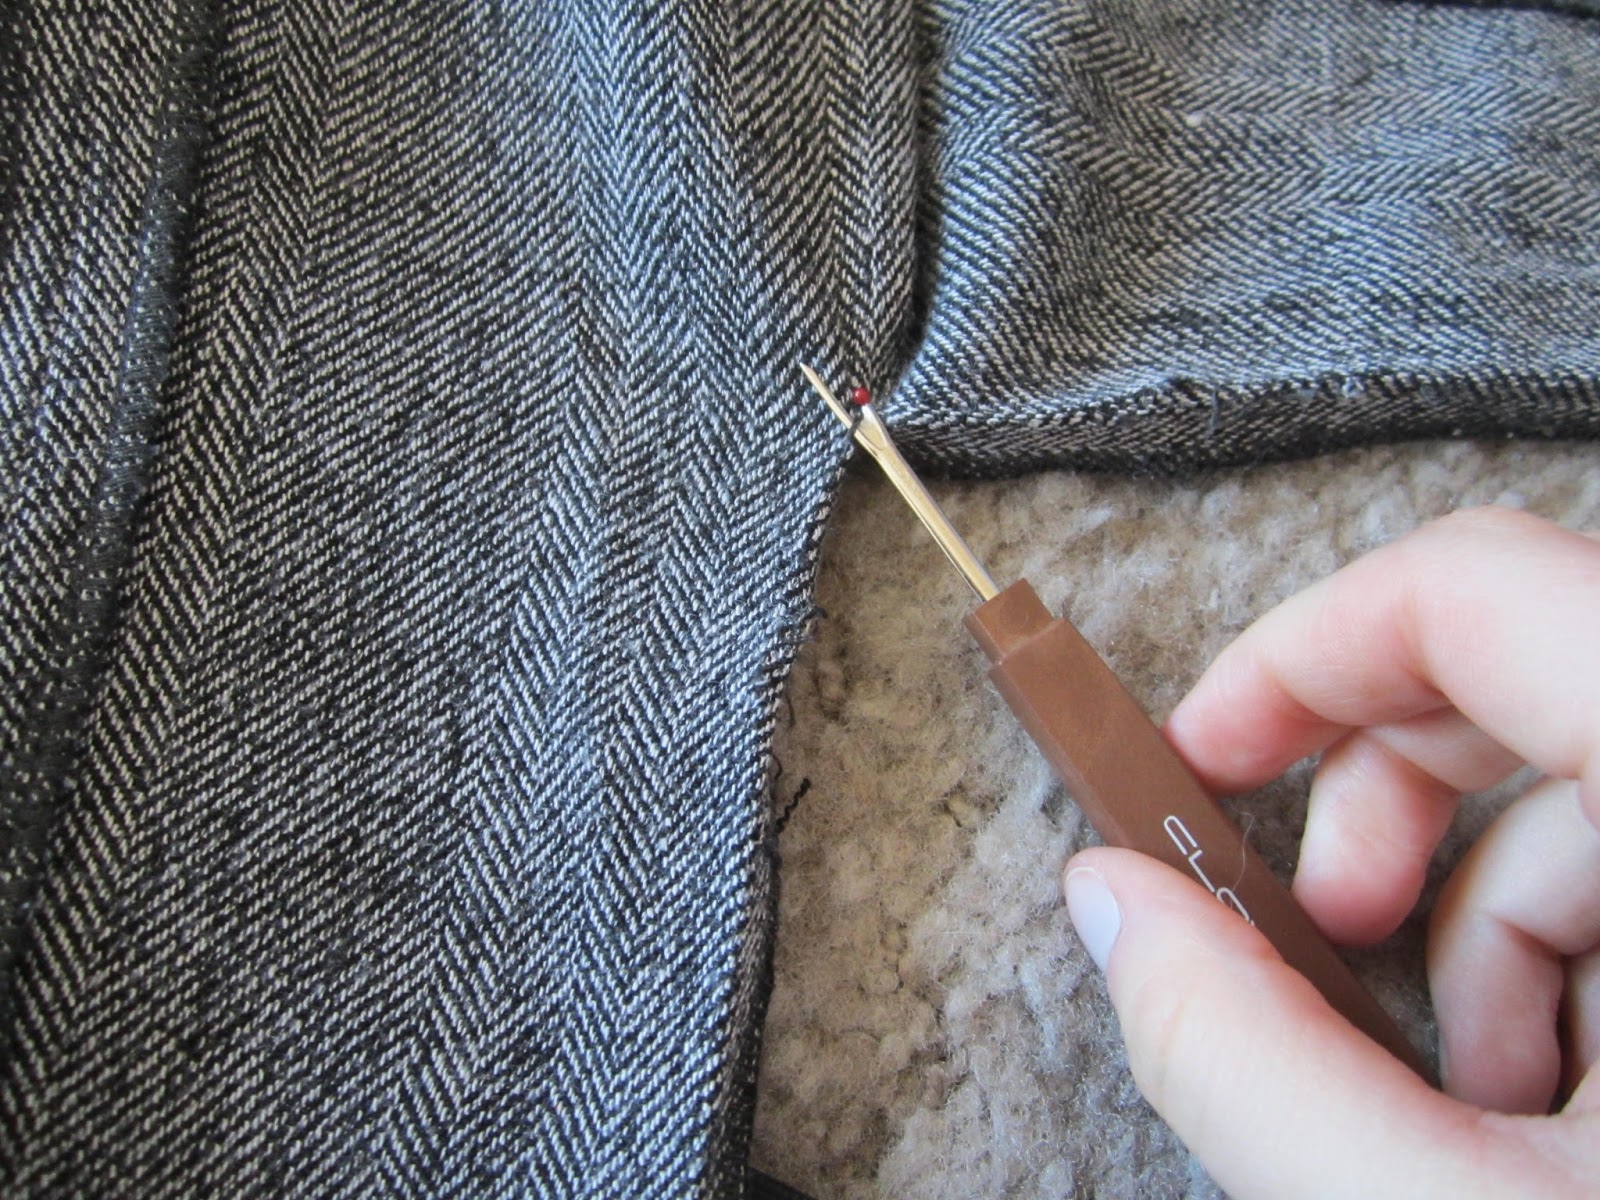
Then I noticed THIS!

ARG!
I'd accidentally stitched through the front AND back of this dress at one part of the appliqué!

I grabbed my seam ripper and quickly fixed the problem, then restitched that part of the NHSS down to just the front part of the dress.

And here's the result!

Here she comes, to save the day!
I feel like a history superhero, saving the world one incorrect date at a time! I like that I finally have a way to wear my NHSS loyalty without having to don a dull T-shirt, and those sleeves keep my shoulders nice and comfortable in this cold weather, making this a dress I can wear right away without waiting for summer!

Have you ever refashioned a boring event T-shirt?  How did you do it?