20 June 2017

A Pirate's Life for Me? Top

This dress couldn't decide if it was going for "nautical vintage pinup" or "clown costume."

I tried to find a telescope to complete the look...
It gets better--the V-shaped bib is actually removable, just in case you didn't want to go for all-out worst-ever-stewardess uniform and instead were going for a more casual just-plain-awkward dress.

Yes, this improves matters greatly :S
Of course the first thing I did was ditch the bib.

Buh-bye!
Turns out the black bow was actually safety-pinned on.  Was it an addition by a previous owner who didn't think this dress was awful enough as it was?  Some mysteries shall never be solved.

The next step was to rip out the strange little rectangular shoulder pads, and remove the now-unnecessary (and rather chipped and faded) buttons meant to attach the bib because that thing was definitely not going back on!

Gone!
And gone!
I decided that this dress was not salvageable as a dress--it was still just too much red and white stripeyness for me to stomach.  So I chopped it off under the existing waistline.

Snip, snip, and a dress becomes a shirt!
Then I cut out the lining, because I didn't like how it made this shirt bubble at the waistline rather than hang straight.

It wasn't too transparent--nobody will notice!

Unfortunately, that was where I made a big uh-oh.  You would think, given the number of times I do this, that I would learn to be extra careful not to snip anything that I don't want snipped, right?  Wrong.

AAARRRGGGHHH!
This was supposed to be where this refashion ended--with a new nautical top.  Now, though, I either had to decide to scrap this refashion wholesale, or find some way to fix it.  I opted for repair.  I couldn't just sew it back together--it would be way too obvious.  I decided, in panic, to cut off the bottom elastic.

Where am I going with this?
Then I cut a long slit up each side of the shirt.

Ok, I'm starting to develop a plan.
Finally, I tied the ends of each slit together with a little knot.

Oh-kaaaayy...
To be honest, I wasn't really sure whether any of this would work.  I was just trying to bring this refashion back from the brink of disaster.  You'll notice I didn't finish any of my raw edges--I wasn't hopeful, at this point.

But...

It's a miracle!
Somehow all of that cutting and hacking and tying and hoping turned out a presentable top!  Hindsight, being what it is, I have since realized that I could have saved myself a lot of grief simply by sewing up the accidental snippage and then covering it with something--probably with the black bow from the bib.  It would have added an interesting feature to this stripey top, and resulted in a much more finished product--without the raw edges that are tucked under the edge of the top in this photo.

But I think this refashion still shows that even when you make refashioning mistakes, there are ways to recover!  I'm glad I didn't give up on this one!


24 May 2017

Summer in Waiting Dress

Hello!  I'm back!  Keeping a blog is a lot more difficult than I thought it would be--I like the writing and planning and posting, but finding time to do refashions to write about it a bit of a challenge.  I'm finally coasting off the end of a very busy bout of working two jobs, and my first priority was to get in some quiet time and reading!  Now that I've satisfied that craving (with the magnificent Seraphina by Rachel Hartman, if you're interested), I can get back to some sewing!

Today I started with this beauty.

I've seen more flattering potato sacks...
The shape of this dress is all wrong.  The waistline sits right above my hips, the length cuts me off mid-calf and makes me look even shorter than I naturally am, and its just overall too big on me.  But this dress did have a pretty floral pattern that was perfect for the sunny summery day outside, and I liked the overall idea of this dress--button-down top, gathered skirt, strapless.  It just needed a little help.

The first thing I tackled was the waistline, which also took care of the bad length.

Snippety snip! Hungry scissors.
I cut off the skirt just above where it joined the bodice, keeping the original gathering and seam.  I could have unpicked the whole thing and regathered the skirt, which would have doubtless created a more streamlined final product, but my whole point is refashioning without rules.  I don't do things the "right" way.  So sue me.

Then I took out the middle section of the bodice, shortening it by about half. 

Chop! Chop!  And goodbye awkward shape!


I wanted a sort of empire height waist on this dress.  Now I had to put these pieces back together again, sans middle section!

Hm, this picture doesn't really explain much
I turned the skirt inside-out, put the top inside (right sides together), and pinned the bodice and skirt along the cut edges, making sure to line up the side and front seams.  Then I stitched.

Chug chug chug...my sewing machine sounds like a train.
Now I had a dress again, but it was still too big.  Enter Gruella II for her part.  I put the dress inside-out on Gruella, and pinned down the sides.  I took this dress in by about three centimeters under the arms, six at the waist, and two along the length of the skirt.

Gruella does her part
Then I stitched down those side wings.  I tried the dress on, decided that it could stand to come in just a titch more, and adjusted the seams accordingly.  Then there was just one more step!

Nom! Nom! Nom!  More hungry scissors!
I took my pinking shears to the bulky extra fabric along the sides and chopped it off.  And here it is!  

Lookin' Lovely!
Now this dress has a shape I'd wear out in public, and just in time for a lovely sunny day! I think this is a vast improvement over the shapeless sacking I started with. 


23 March 2017

The Back-on-the-Bandwagon Dress

Here's a much belated refashion, though my absence has not been for lack of trying!  You see, I've had to deal with two failed refashions over the last month.  First there was this:

Just what is the purpose of this?
My intention with this dress was to simply take it in along the sides and shorten it, and turn the sleeves into cap sleeves.  It wasn't supposed to be difficult, but then I discovered that the liner in this dress was in the final stages of decrepitude, and it suddenly no longer seemed worth the effort to repair it.

Then there was this dress:

Rather summery for March.
This was supposed to be my St. Patrick's Day outfit--in fact, I wasn't intending to make any changes to this dress at all until I noticed that it was covered in stains.  I scrubbed it with stain remover, but to no avail.  In a last-ditch effort to make this dress wearable, I tried appliqueing some patches over the stains, but frankly, it just looked stupid.

So that brings us to today's refashion, which is admittedly not all that interesting, but at least resulted in an improved product rather than full scale destruction and frustration.

Here's the dress:

I lack the boobage to fill out this dress
This is a 100% polyester old-ladyish dress with some very charming detail at the neckline.  Here's a close-up:

Pretty!! 
All this dress needed was a bit of slimming around the bust area.  I put it inside-out on Gruella and pinned the sides to take in the top half of the dress.

Just a teeny bit
Then I ran it under my machine, tried it on again, was happy with the fit, and trimmed off the excess:

Zipping down the pinned line!

Snippity snip!
Here's the new fit:

Do you notice a difference?
Ok, so maybe there isn't much of a difference to notice, here, but at least I finished a refashion, ok?  I dressed it up with my polka-dot tights to give this rather staid dress a bit of fun, and added a blazer to keep my shoulders warm.

The end result!
This was a difficult refashion not because it was tricky sewing, but because I had to get over my disappointment and frustration at my earlier failures to pull this one together.  Now that I've managed a success, I feel much better moving forward!


19 February 2017

Marilla's Nightmare Dress

Sorry for my long absence, an unexpected internet outage and an expected trip to Vancouver put me off the refashioning bandwagon for a while.  But don't worry.  I've got a doozy of a refashion to make up for it today!

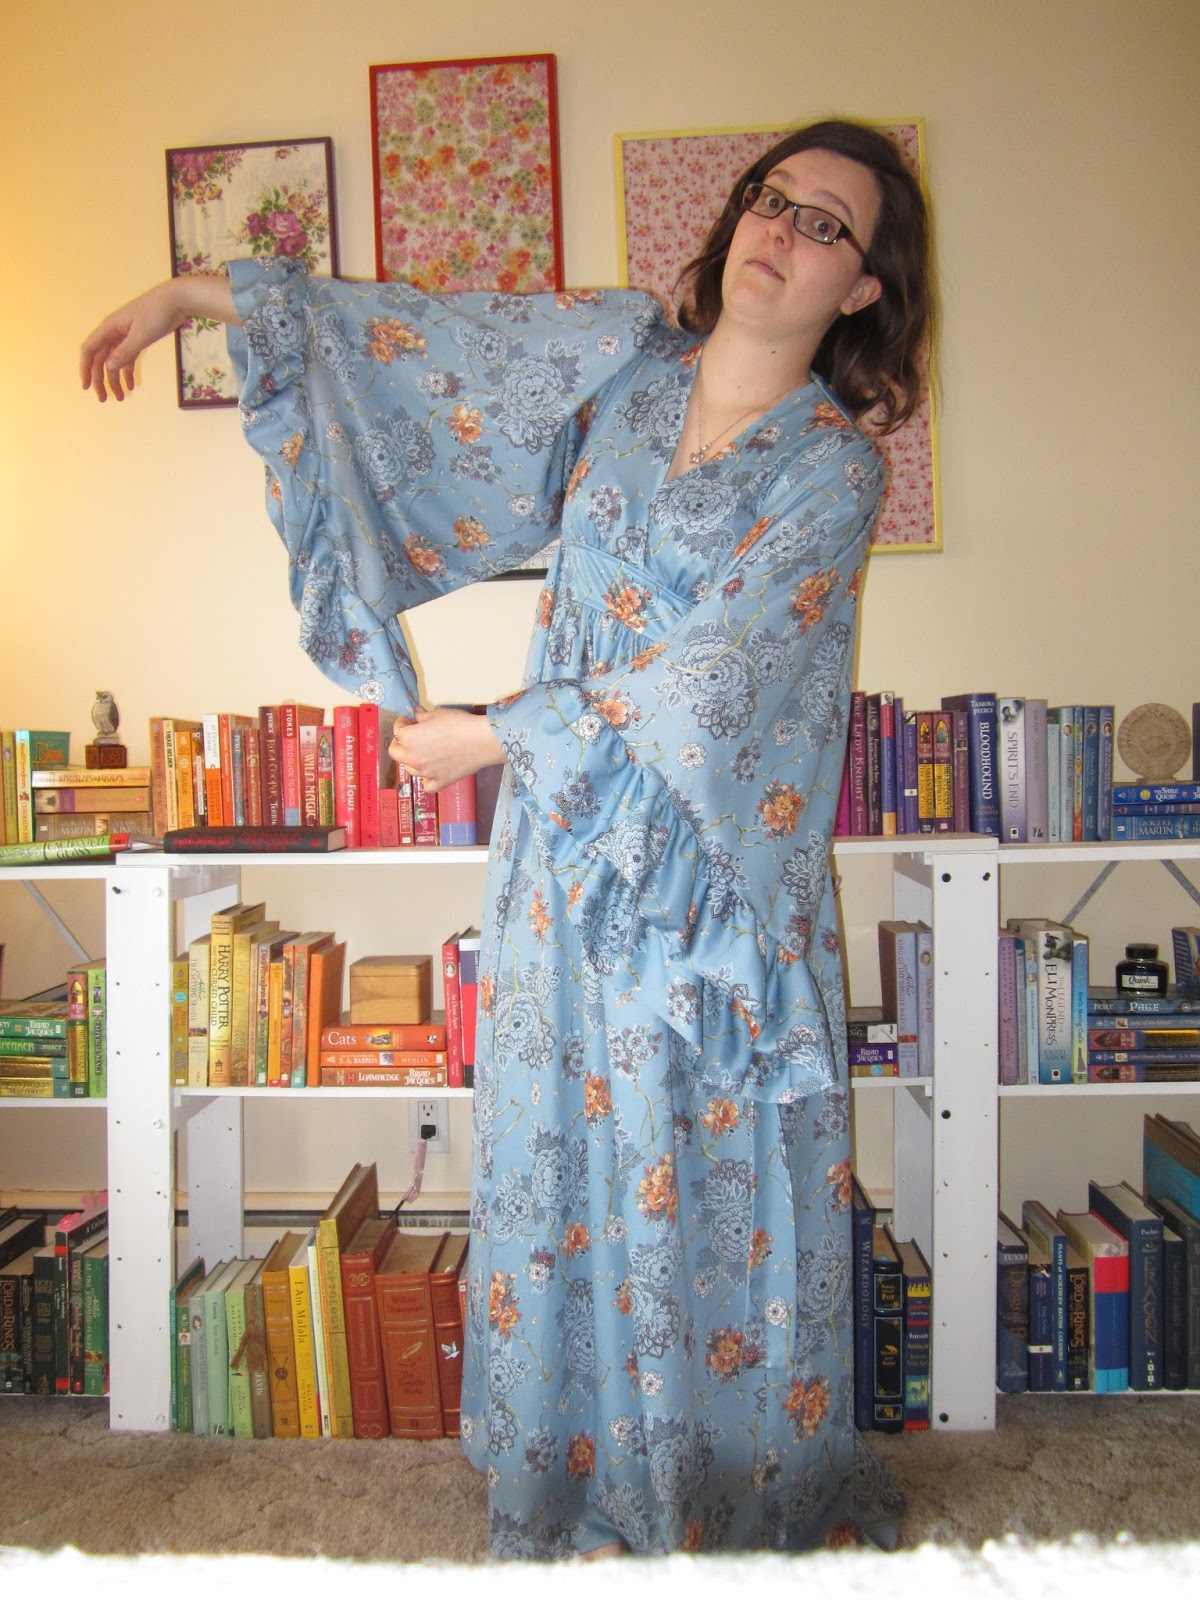
In Anne of Green Gables, Anne's stern guardian Marilla refuses to make Anne a dress with puffed sleeves (all the rage in the 1860s), saying "There's enough material in those sleeves alone to make a waist, I declare there is."  Well, I found the dress to give Marilla nightmares.

I swear, I could fit inside that.
Ok, let's address the elephant in the room--those sleeves are horrible.  But take another look at that dress.

These sleeves beg the question--how would you eat with them?!
It actually fits me perfectly.  I don't exactly count this as a point for this dress, because all it shows is that this weirdo ruffly kimono-thing is supposed to look exactly like this.  I'm not sure why anyone would want that.  I was so distressed by those sleeves, that I just hacked them off without thinking any further ahead.

Never again, giant sleeves, never again.
Then, of course, after making such a fuss about how I could fit into those sleeves, I simply had to try.

It fits, with room to spare!
After I finished marvelling at the sleeves, I began trying to decide what to do with the rest of the dress.  I didn't like the side ties, but I dithered about how to remove them.  I thought about doing the job properly, by unpicking the seams they were sewn into and then restitching the seams, but I didn't have enough pale blue thread to redo the topstitching on the front panel.  I decided to just cut them off as close to the seam as I could, and pray for the best (fortunately, I could tell from the unserged seam allowances inside this dress that it wasn't going to fray).

two side-ties in pretty fabric removed.
Unfortunately, I accidentally snipped a little too close when I was removing the right side tie.

Oops!
Yep, that's a little hole, and before I could go any further with this refashion, I would have to fix it.  I was lucky that it was so close to an existing seam, and in a part of the fabric that had a busy bit of pattern--my repairs wouldn't be too obvious.  I grabbed my tiny amount of blue thread, and the smallest needle I own.

Needle and thread to the rescue!
I quickly closed up that hole from the back.

Doing stitches!
Now that I'd fixed that problem, it was time to figure out what to do with those sleeves.  I started off simply by measuring to make sure they were the same length, and then folding the raw edge under and stitching it down (I had to make do with white thread--not perfect, but it was the best I had).  That left me with a really awkwardly gaping sleeve that looked like this:

Big, awkward armhole.
I played around with a few different ways of improving the sleeve opening, and eventually decided that the easiest would be simply to fold over two bits along the top section of the sleeve to make it look like this:

Much better fit!
 I pinched the fabric about an inch away from the apex of the sleeve, and folded it towards the top.

Fold one!
 Then I did the same on the back half of the sleeve.

Fold two!
I pinned it and stitched along the existing hemline to hide the fact that there were two lines of stitches along that section of the sleeve.  Then I fastened the edges of the hemmed part with a tiny stitch and knot.

Hidden stitch!
Those sleeves were finally taken care of!  For my final big change, I lopped off a good chunk from the bottom of the skirt.

That skirt had a lot of fabric in it!
I hemmed the bottom raw edge.  I should have hand-stitched it with a whip stitch, which would have made the bottom hem almost invisible and very flowy, but I was short on time.  So I went with the quicker option and just stitched a normal hem on my machine.  Then I took all my new seams to the ironing board for a quick press.

Especially those sleeves!
Here is the final result!


I confess, I'm still not thrilled about the sleeves.  I may revisit this refashion in the future, and see if I can do something better with them.  But considering what they started out as, I'm pretty pleased with this transformation!  This was one of my biggest refashions to date, so there were bound to be a few hiccups.  Tell me about your biggest refashion!  Did it turn out the way you wanted it to?


6 February 2017

Puppy-Watching Paisley Skirt

I decided to do a refashion this morning before going to my parents' place to puppy-sit for the afternoon.  I wanted something comfy to wear, which for me usually means a skirt.  When I dug through my refashion closet, I found this.

How d'ye do?
This is one of those extremely common thrift store items--the little old lady skirt.  They're not usually very flattering, but this one was particularly bad.  Part of the problem was that this skirt had clearly been crumpled up somewhere for a very long time, and the pockets (yes, it has pockets!) were all bunchy, hence my rather massive hips in this picture.  The other problem was this:

Frays for miles!
The bottom hem of this garment was barely clinging to life--or maybe it had already given up.  Either way, it was a mess, but one that I wasn't too worried about.  You see, I was going to fix both the little-old-ladiness of this skirt and that bottom hem all in one go.

Bye-bye, frayed edge and awkward length!
When in doubt, cut it off.  Maybe not the best rule for surgeons, but one that seems to work pretty well in the refashioning world.  I pinned and stitched a nice wide hem, since I'd left myself plenty of length to work with. 

My hem shall not come undone!
Then I went to town with my iron, because this skirt still had that bunchy-pockets problem going on.

hissss!
After pressing this skirt back into a wearable shape, I decided I might as well pretty-up for my "after" picture, so I toodled around trying on different shirts and leggings to go with it.  Take a look at that awkward skirt now!

fancy shmancy!
The necklace and lipstick are probably not going to stick around for puppy-sitting, but that skirt certainly will!  Changing the length of a skirt or dress is one of my favourite ways to refashion.  What's yours?